
SM
Some Ideas About Use of the GigPan Unit and Stitcher
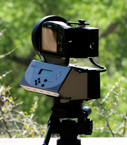
The GigaPan EPIC is a programmable picture-taking robot. You simply mount your point-and-shoot digital camera (mine is a Canon SX110 IS), set it to full zoom, set the limits of the area you want and go. The included GigaPan software running on your Mac or PC will take the resulting set of photos and stitch them together to form a very large panorama. They can then be uploaded to the GigaPan site and even linked to Google Earth and located in the place they were taken.
The Gigapan system was developed by Carnegie Mellon University in collaboration with NASA Ames Intelligent Robotics Group, with support from Google.

The interactive panorama placement into Google Earth is quite powerful and provides a way to view these exciting photographs as if you were actually on the spot. However, the process has a steep learning curve in order to achieve “perfect” placement.
I have used a procedure that basically follows what is in the Gigapan manuals. Some of what I have learned using the tool has gone into my comments submitted to the GigaPan Forum. At the request of a user, David Engle (Texas_Photo), I have repeated here what I told Gary Grimm (gogrimm) regarding problems he encountered:
Here is the basic procedure that I follow.
1. Get a rough placement on the map. You can tweak it closer after you take care of the horizon objects.
2. Set the transparency slider to around halfway and get the horizon done first, but note that the FOV and image floor angle values that the stitcher provides may be wrong. (This is true for your downtown Boisie pan, ) Then pick one unique feature on the horizon near the center and set the heading to match.
3. Inspect the lineup of the features to the left and right. If they don't line up, adjust the FOV so they are closer.
4. Adjust the floor so the horizon features match vertically. Changing the FOV will change the vertical FOV so you may have to make multiple passes through FOV, heading and image floor until everything lines up. This should work well with the Boise pan because there are good mountain features to line up with.
5. Tweak your position on the deepest zoom on the map so that near objects line up. The image plane default is quite far away so you can bring that down so that foreground objects meet with their Google Earth counterpart. 10m is not unusual, especially if there are nearby objects or terrain in your pan.
6. Set your elevation down to 2m or less to roughly match the height of your unit. This will mainly impact the distance that near objects appear. (assumes the Google Earth elevation for that spot is correct. If you are near a steep slope it may not be.)
7. If you find that your horizon matching has a dip or a hump as you scan across from left to right you can experiment with tilt and roll to tweak those out. This is quite difficult to do, let alone explain. Save your current settings, then play. It is best to try these when pointing at the center of the pan so that tilt and roll match your expectation.
Expect to make multiple tweaks before its perfect. It could take a half an hour or more. 360s will go easier because you know the FOV is exact.
Note that in your Boise pan your image is way off in FOV (not your fault). Reduce it quite a bit (-15deg or so) and you will be off and running. The 3D buildings have been rendered so you should turn on that layer and it will help, too.
The process will improve with time, but it works quite well now.


Interactive Panorama Placement in Google Earth
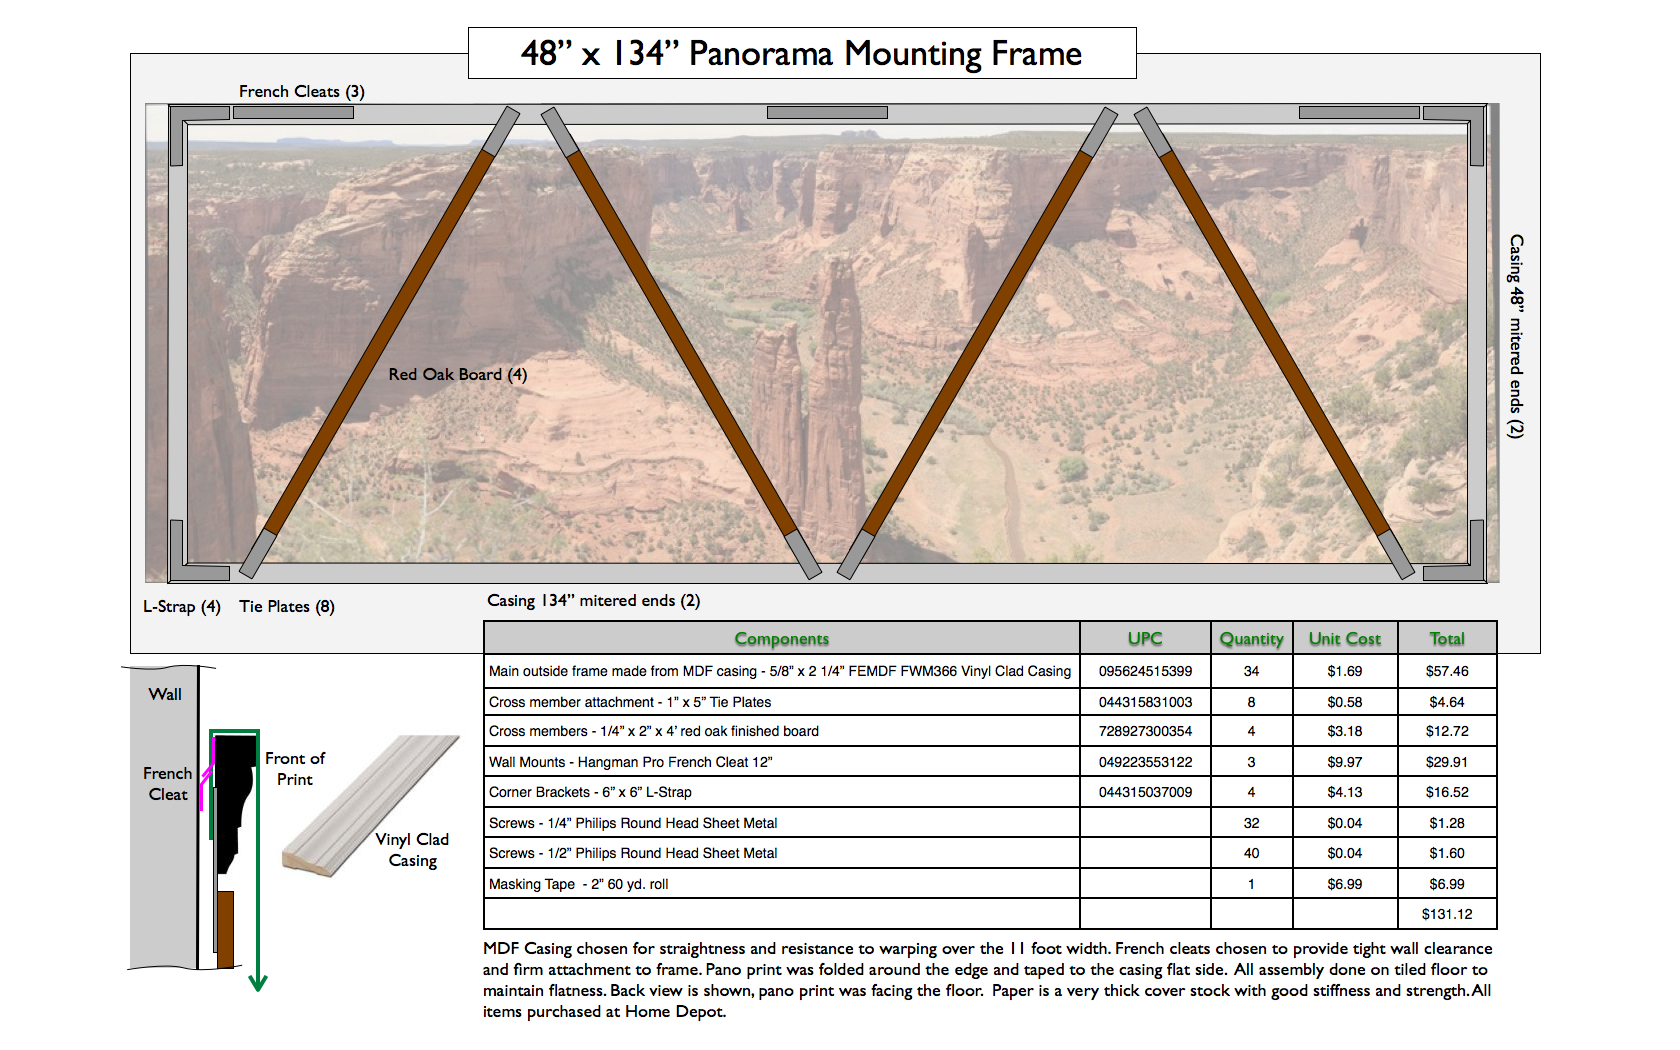
When I was offered the opportunity to have one of my larger GigaPan photos printed on paper up to 60” wide, it made me look into the challenges of creating a structure almost 14’ long. I wanted it to be affordable and a single piece to hang on the wall. The paper was quite thick and did not need a backing to stay reasonably flat. All things considered I decided to settle for 48” maximum because of the extreme length and the availability of materials. The method I chose was essentially a frame similar to what would be used for a painting canvas but without all the heavy bracing needed to stretch a canvas.
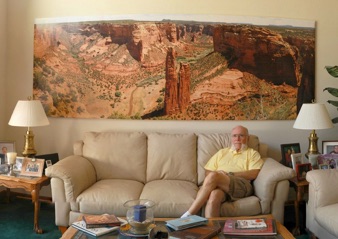
Details of the materials and process are in this linked image. The GigaPan original is HERE. The GigaPan of the result shown above is HERE.
How I Mounted a 4’ x 11’ GigaPan Print